It’s been a while since I posted anything. I was busy with my work and didn’t get time to publish anything. Today, I am going to show you how you can supercharge your MacBook by making use of Apple’s support for NVMe drives beginning with the MacOS X Yosemite 10.10.3. Even though they added support since this version, I would recommend you update your mac to latest MacOS Catalina (10.15 as of today).
Most of the content here is borrowed from this link at MacRumors. I am just trying to simplify the whole process for you. To keep yourself up to date I would advise you to follow their thread.
Why Do We Do This?
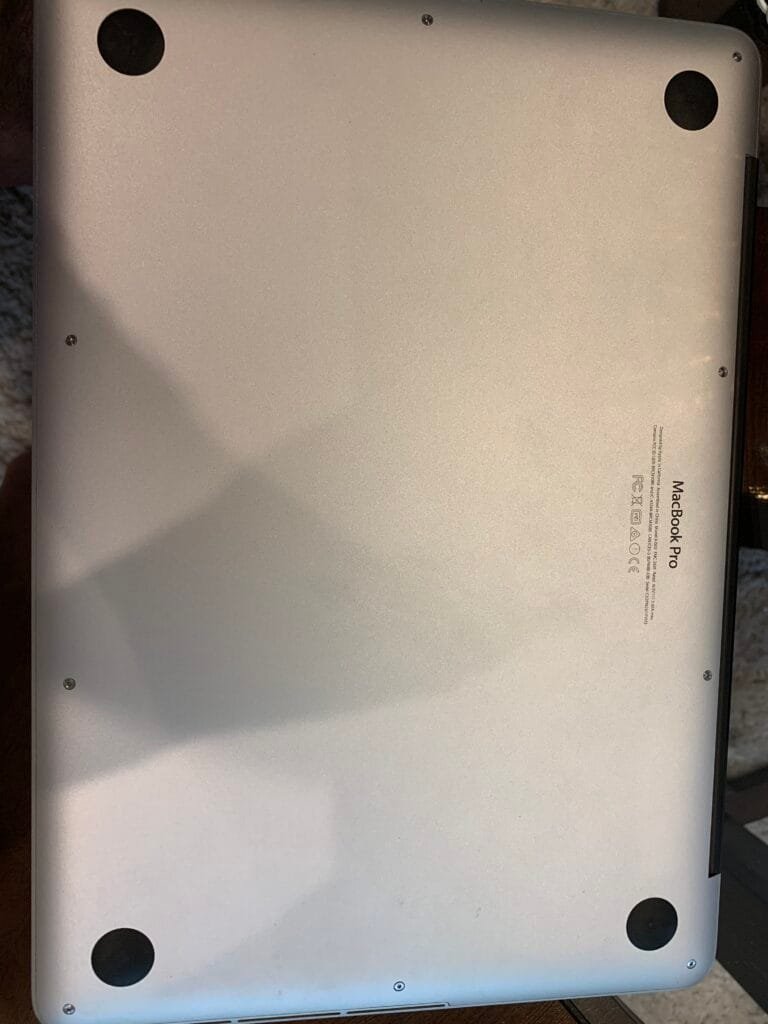
I had a MacBook Pro Early 2015 with 128GB of storage. Space was running low so I decided to give this a shot as M.2 are pretty cheap these days. And, there are good ones out there which perform far better than Apple’s proprietary SSDs and at a fraction of what these actually cost.
So let’s get started! I will try to make this as less of a daunting task as possible.
For this tutorial, here are the prerequisites:
- Make sure you have the latest MacOS (Catalina as of today) installed in your system with current M.2 SSD drive. You can install this from App Store. This step is crucial because of latest bios that supports NVMe Express.
- If you want to transfer over your existing files (or OS) to new SSD, make sure to do a full Time-Machine Backup.
If you have any questions on these topics, please drop a comment below so that I can help you out further.
Now, onto the actual process. You will need the following:
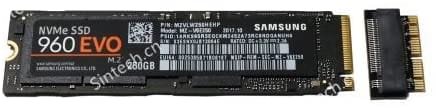
M.2 NVMe Drive of your choice
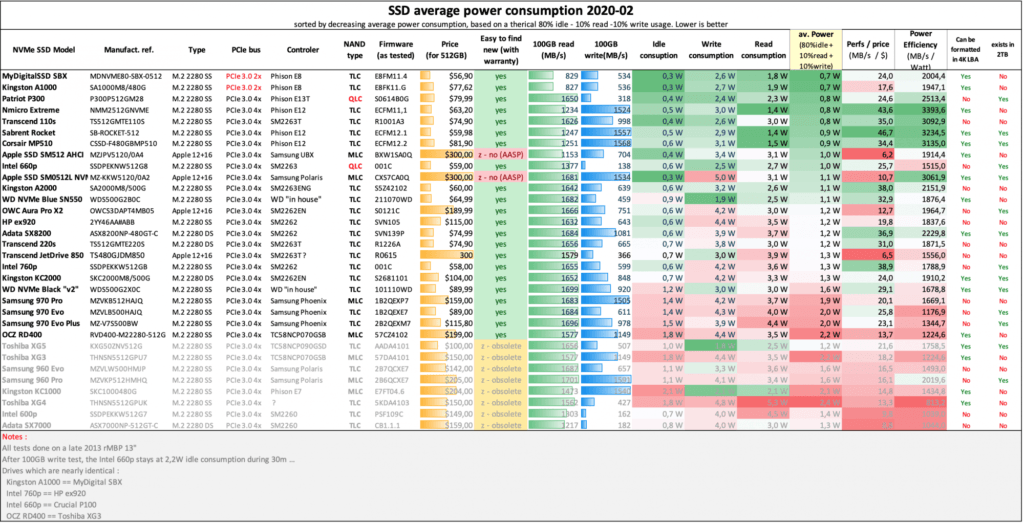
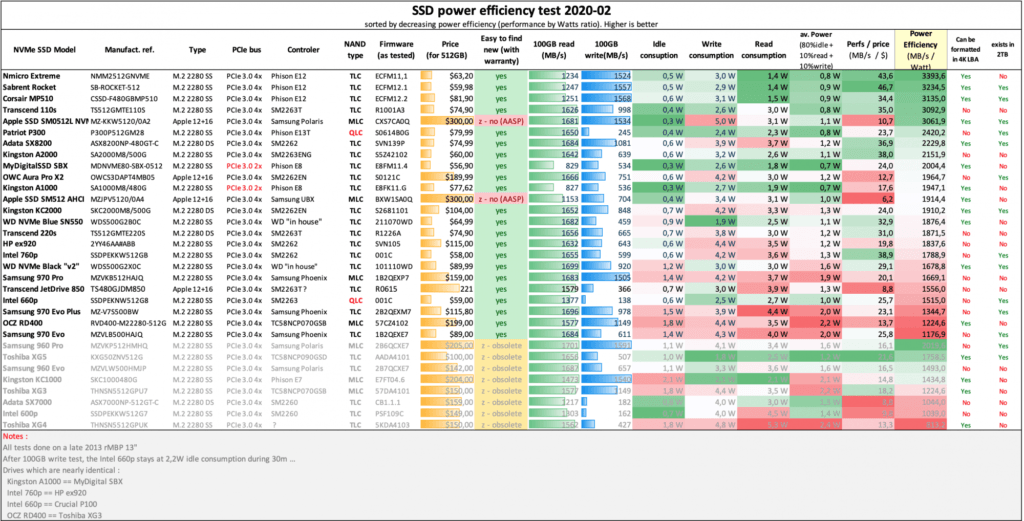
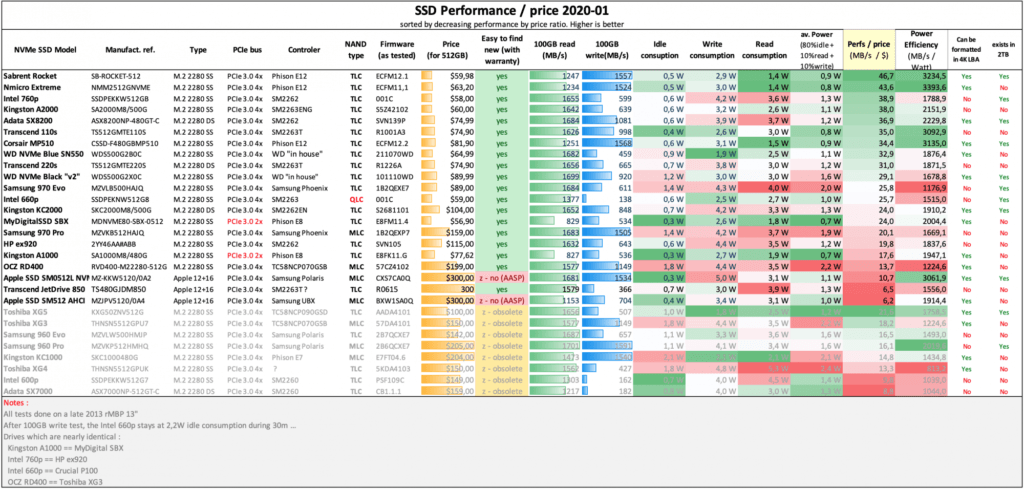
I say your choice because it is really up to you which drive you want. But, there are some good NVMe drives out there that have shown to perform much better with these setup. Please look at these charts (taken from MacRumors) to see which one performs better.
Recommendation:
I would personally recommend the following SSDs.
For 1TB Option
For 512GB Option
- Sabrent 500GB Rocket NVMe PCIe 4.0 M.2 2280 Internal SSD Maximum Performance Solid State Drive (SB-ROCKET-NVMe4-500)
- Sabrent 512GB Rocket NVMe PCIe M.2 2280 Internal SSD High Performance Solid State Drive (SB-ROCKET-512)
- Intel SSD7 760p Series, 512GB SSD (SSDPEKKW512G8XT)
- Samsung SSD 970 PRO 512GB – NVMe PCIe M.2 2280 SSD (MZ-V7P512BW), Black/Red
M.2 Adapter
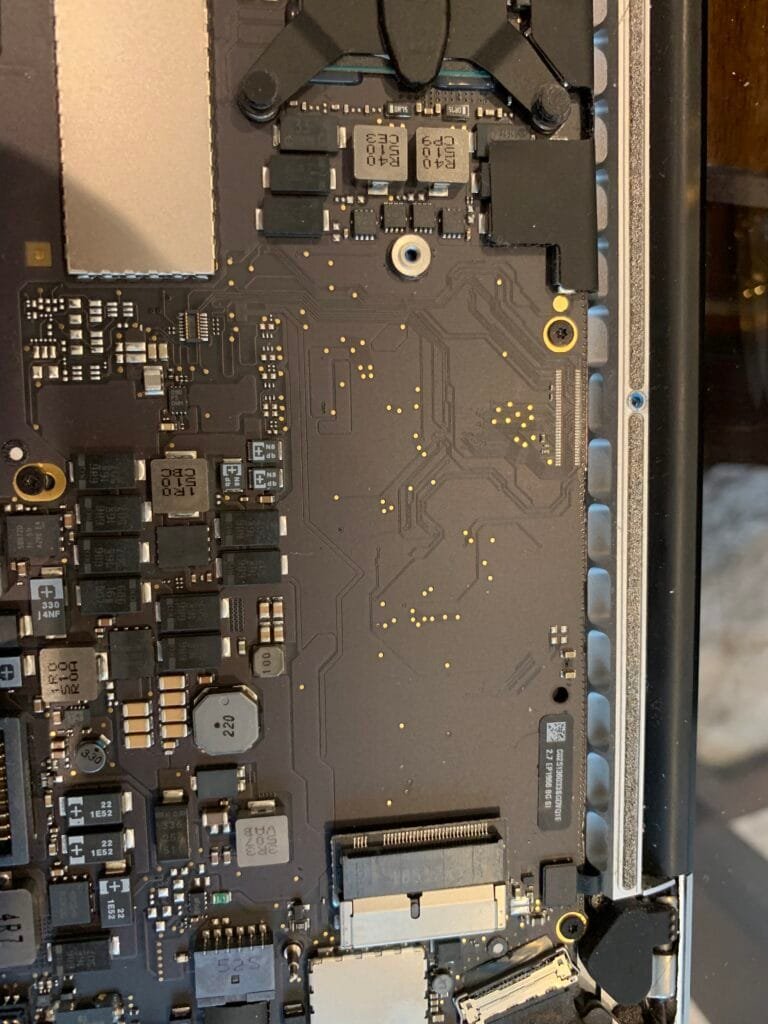
Once you have the M.2 of your choice, next is the interface that goes between Apple’s proprietary M.2 slot and your M.2 drive. For this we have couple of options available from different vendors. But, I personally prefer Sintech Adapters. The MacRumors forum suggests the following as well.


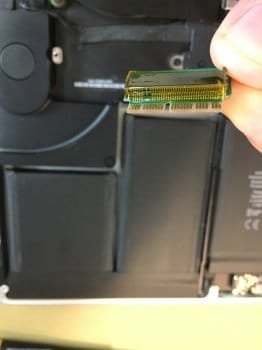
Kapton Tape (If Required)
Be mindful of the adapter you buy, the later ones do not need Kapton tapes over the connector since they are properly insulated. If your adapter has connector pins exposed you can buy some Kapton tape and apply it over the connector like so.
You can buy one here: https://amzn.to/3vjxlv2
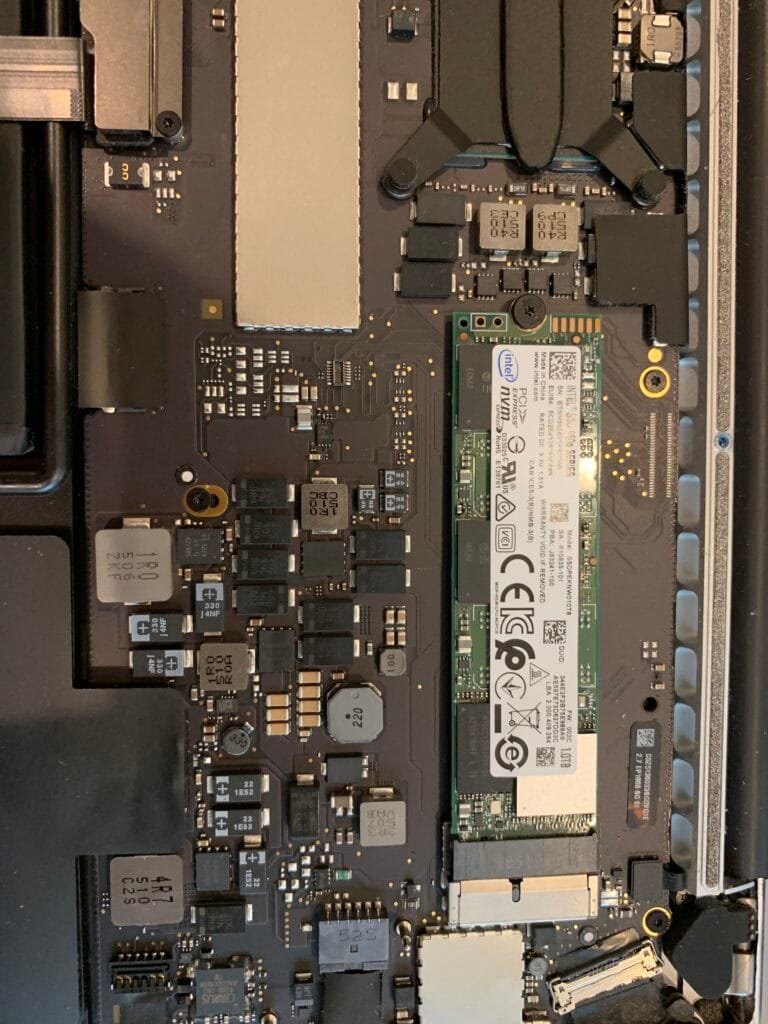
Once you have everything, next thing is installing the M.2 into the Sintech adapter.
Finally, install the Sintech Adapter with M.2 SSD into your macbook. It’s as easy as that!
Hybernation Issue with 2013-2014 Laptops (copied from MacRumor Article)
Starting with macOS Big Sur 11.0.1, Apple has released Root ROM or system firmware for 2013-2014 MacBook Pro and MacBook Air models that allows these models to be upgraded with NVMe drives and prevent deep sleep issues without further system modifications.
* Late 2013 MacBook Pro 13” with Retina Display (MacBookPro11,1): Boot ROM 427.0.0.0 and higher
* Mid-2013 MacBook Air 11”: Boot ROM 4xx.0.0.0 and higher
Updating to those 4xx.0.0.0 versions of Boot ROM or system firmware will make any additional modifications to prevent unexpected system restarts unnecessary; however, it has been noted that the hibernation and autopoweroff behavior of those MacBooks models has been changed and that the battery discharge is higher than with the original PCIe SSD.
macOS release prior to macOS Big Sur 11.0.1 ship with a Boot ROM or system firmware for 2013/2014 MacBook Pro (13”, 15”) and 2013/2014 MacBook Air (11”, 13”) that included a DXE NVMe driver which is incompleted or compressed. This caused 2013 and 2014 MacBook models to not wake up from hibernation and restart. This problem existed with every NVMe SSD (Apple NVMe SSDs that shipped with 2015 MacBook Pro models, third-party drives like the OWC Aura Pro 2, Transcend 850 NVMe SSD).
To prevend this problem you had two options:
- Disable hibernation or deep sleep by disabling hibernation via Terminal: “
sudo pmset -a hibernatemode 0 standby 0 autopoweroff 0
- Patch the Boot ROM or system firmware with an NVMe driver from 2015 MacBook model equivalents.
Disabling hibernation had the drawback that your MacBook would consume more power when sleeping for a longer time compared to proper hibernation (suspend to disk) with the default settings. Your battery would lose ~10% overnight.
The process of patching the Boot ROM or system allowed hibernation to work but required additional hardware. See
https://forums.macrumors.com/thread…ssd-to-m-2-nvme.2034976/page-65#post-26224320 for a guide that walked through the required steps.
Other options included a ”Matt Card” from CMI zapper.
And that’s all folks, you’ve just supercharged your Macbook!